
Clientish Documents
Step-by-step guides for every module, from your first workspace to proposals, billing, support and automation.
Add and Edit a Team Member
Add someone to your team with their role and access, and keep their details up to date.
Add someone to your in-house team, and keep their details up to date.
Overview
This guide goes through the Add team member form and editing a member.
Who Can Access
Team members need Create Team Members to add and Edit Team Members to edit.
Add a Team Member
Open the form
Click Add Member on the Team page. Set up at least one team role first in Settings → Roles & Permissions.
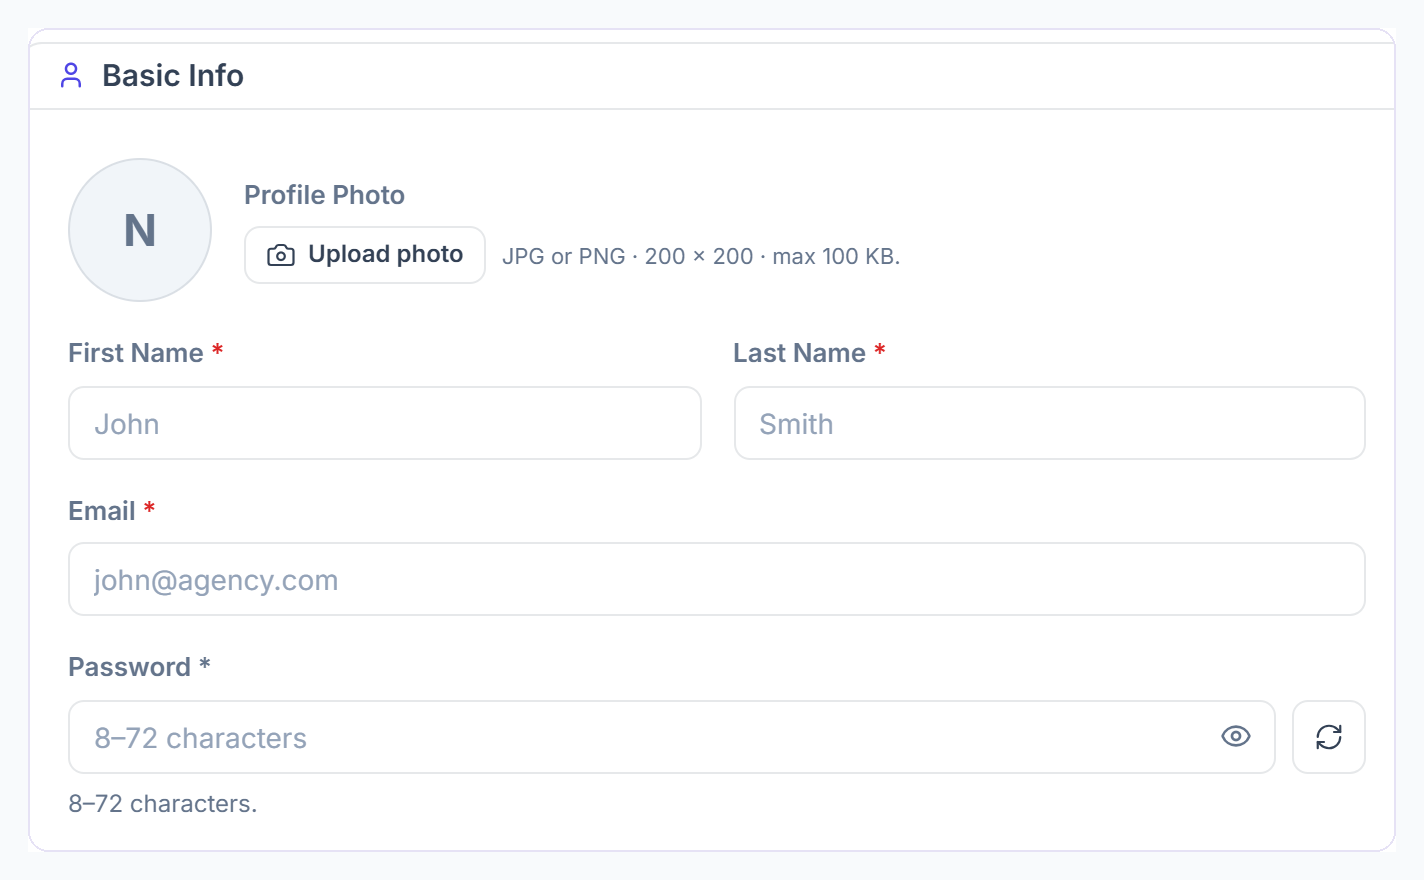
Fill in the basics
Under Basic Info, add a photo if you like, the First Name, Last Name, Email and a Password of 8–72 characters. The button next to it makes a strong one.

Add their details
Contact, Employment, Personal Details, Address, Education and Bank Account are all optional.
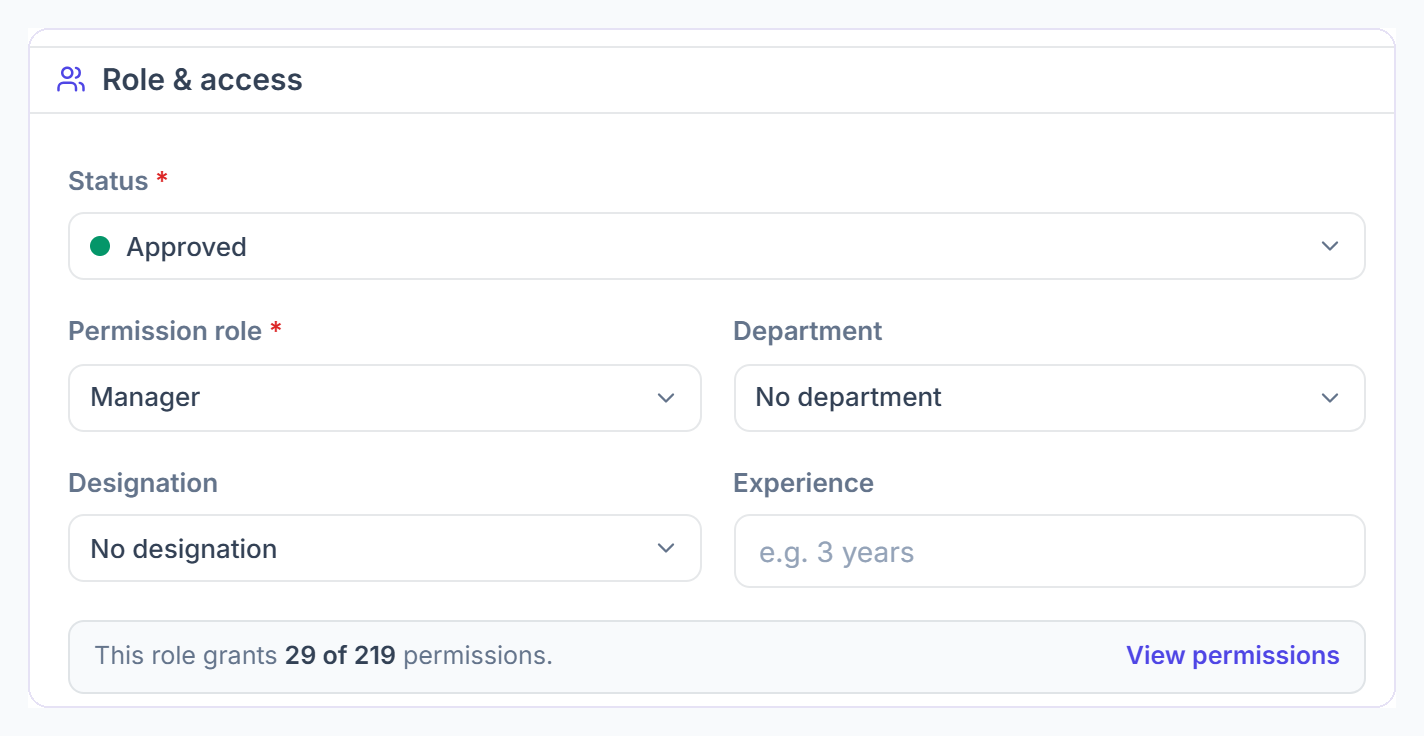
Set their role and access
Under Role & access, choose the Status (Approved lets them sign in), the Permission role, and their Department and Designation from the lists you set up in Settings. The line below shows how many permissions the role grants.

Save
Tick Send welcome email to new team member to email them a link to set their own password, then click Add Member. They also get an email to confirm their address, and can sign in once they have.
Edit a Member
- Click Edit on their page or in the member menu, change their details and click Save Changes.
- A new email address takes effect only after they confirm it from their current inbox.
- Under Password, Send reset link now emails them a link. Or tick Reset password and send welcome email, or Change password to set one they confirm by email. Their old password works until they do.
- Changing their role removes any personal permissions they had.