
Clientish Documents
Step-by-step guides for every module, from your first workspace to proposals, billing, support and automation.
Team Messenger: Channels and Direct Messages
Channels, private channels and direct messages for your team, and who can manage them.
Team Messenger is your team’s own chat: channels for topics and direct messages between two people. Clients never see it.
Overview
This guide covers channels, direct messages and who can manage them. Sending, replying and attaching files are in Sending Messages in Team Messenger.
Who Can Access
Team members need View Messenger to see it. Creating channels, starting direct messages and managing channels each have their own box. Team Messenger is on every plan.
Step-by-Step Guide
Open Team Messenger
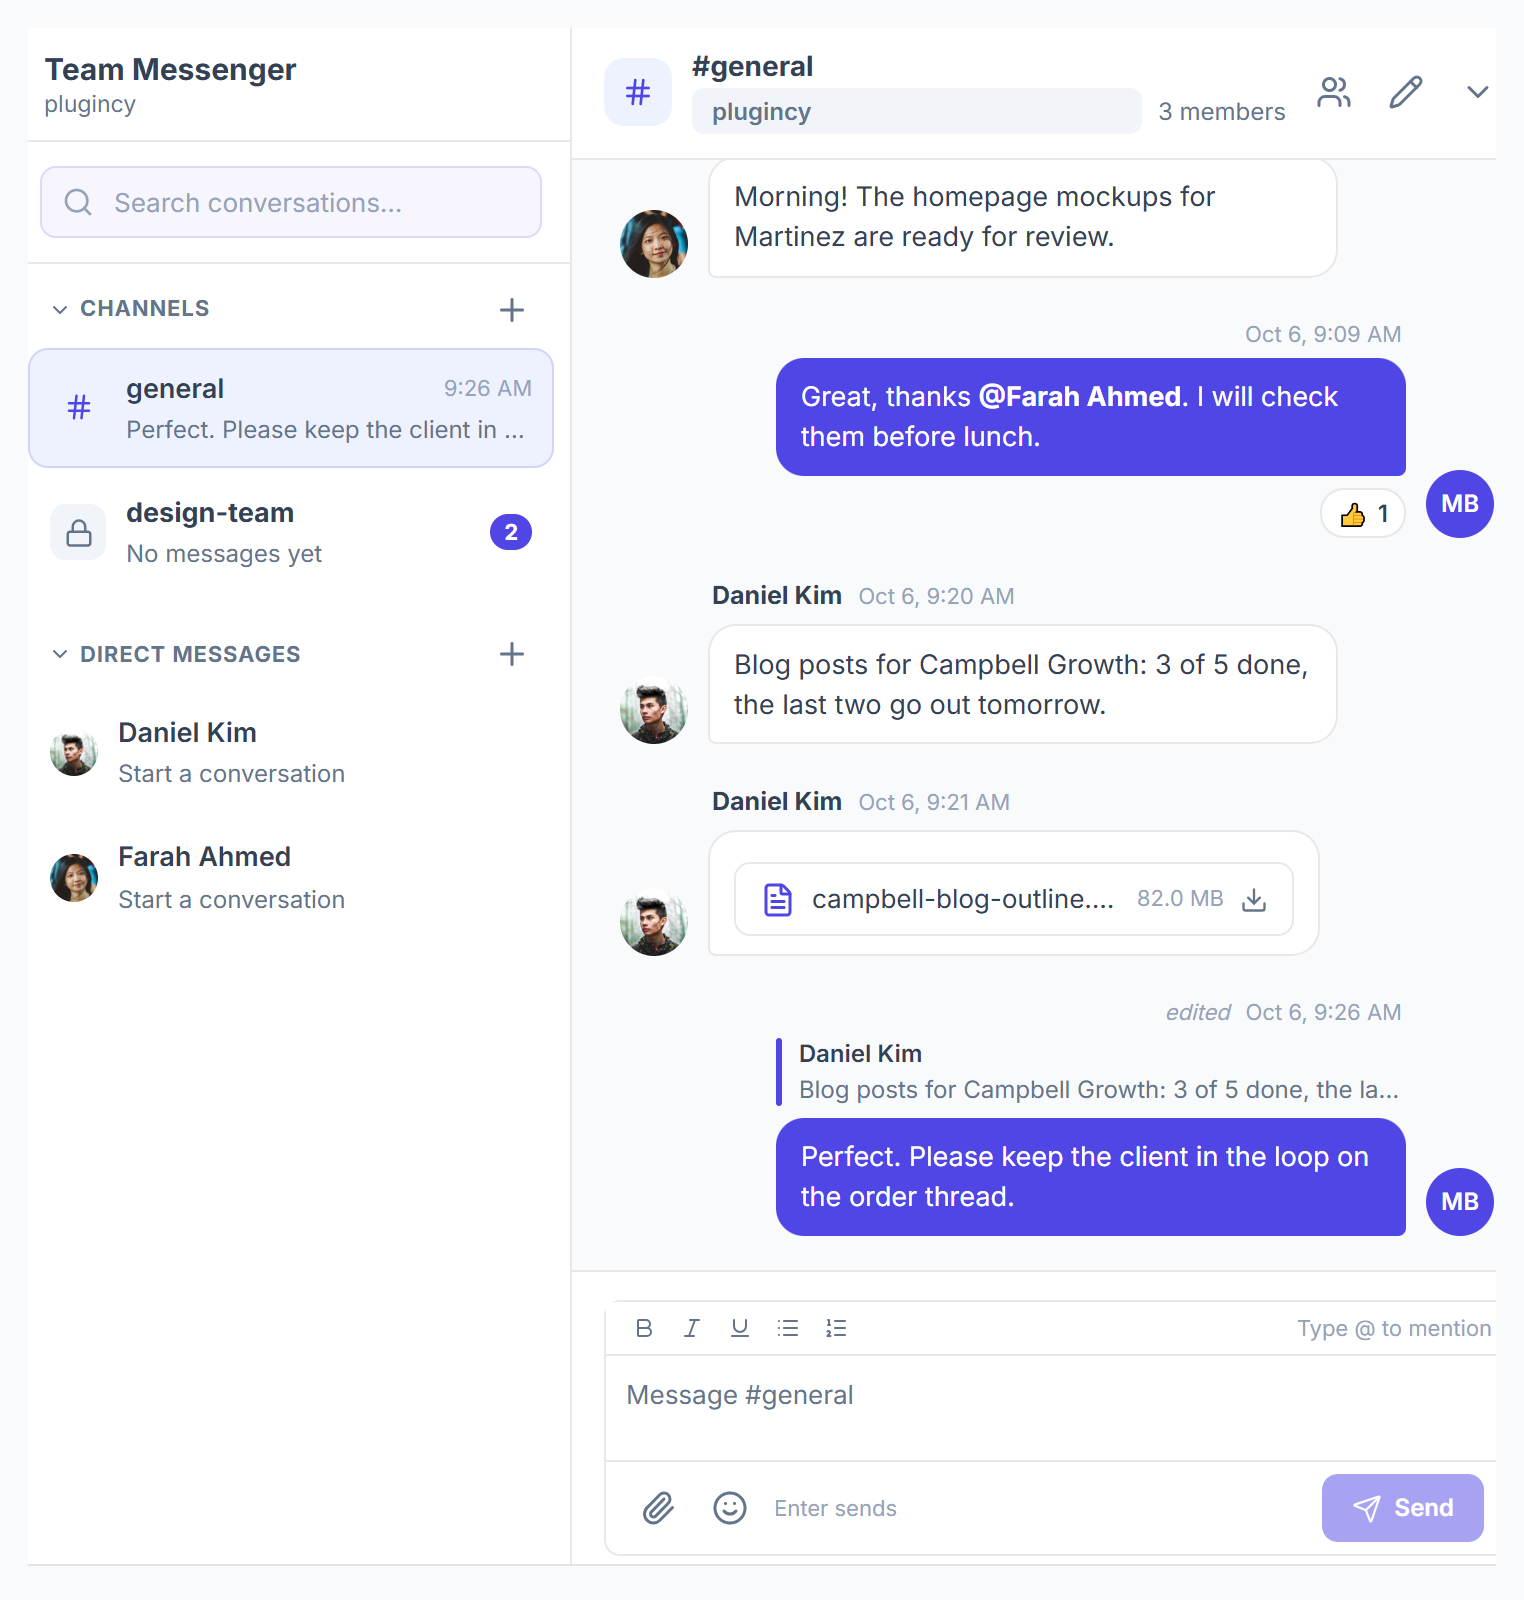
Click Team Messenger in the sidebar. The left side lists Channels and Direct Messages. A number shows unread messages.

Create a channel
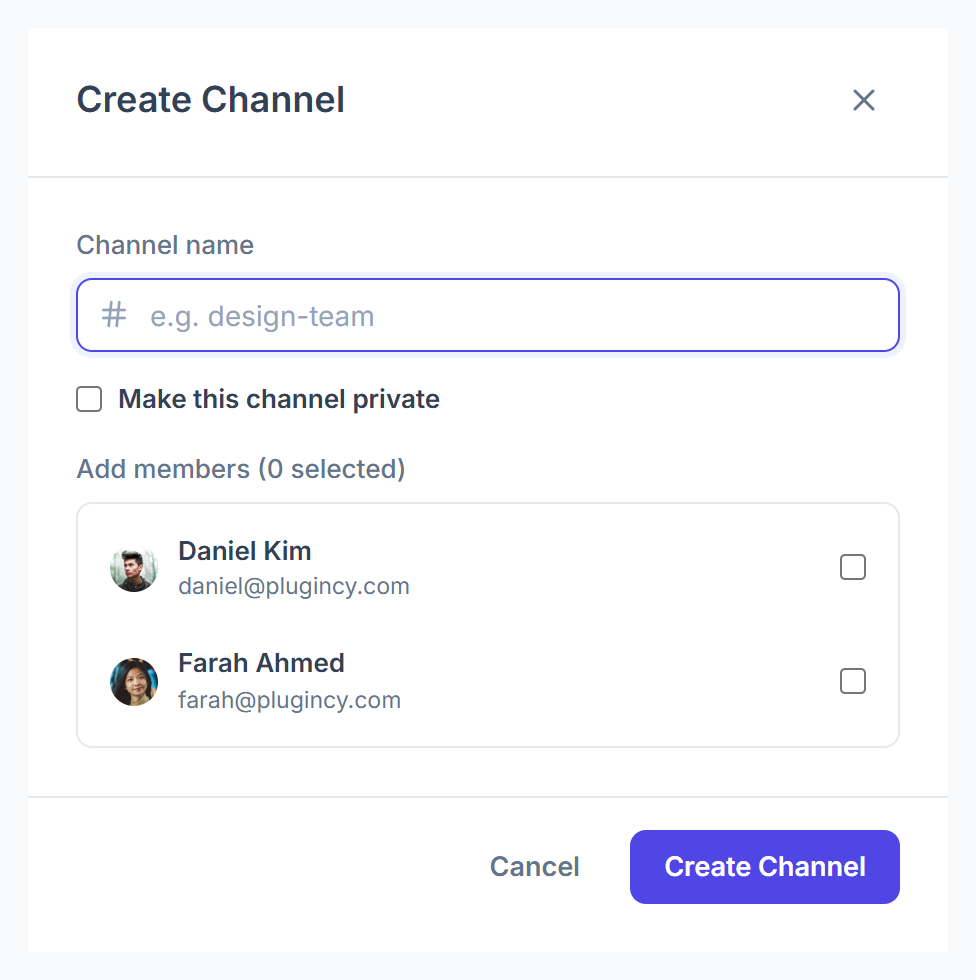
Click + next to Channels. Enter a Channel name, tick Make this channel private if only invited people should see it, choose members and click Create Channel.

Start a direct message
Every teammate is listed under Direct Messages. Click a name to start. Use Pin to top to keep someone at the top; only you see your pins.
Manage a channel
In the channel header, use the members, edit and delete buttons. Removing a member keeps them out until someone adds them back.
Channel Types
Who Can Change What
- Renaming or deleting a channel needs Manage Channels. Creating it isn’t enough.
- Adding or removing members: the channel creator, the agency admin, or Manage Channels.
- The creator can’t be removed from their own channel.
- Deleting a channel removes all its messages for good.