
Clientish Documents
Step-by-step guides for every module, from your first workspace to proposals, billing, support and automation.
How to Add Progress Steps to an Order in Clientish
Add your own milestones to an order's Progress card, place them, hide them from the client or mark them done.
The Progress card on every order in Clientish fills in automatically from the order’s status, payment and intake form. You can add your own milestones between those steps, such as a first draft or a review call, so your client sees each one in their portal.
Who can do it: the owner and admins, and team members with Manage Order Status or Edit Orders
How to Add a Step to an Order’s Progress
Open the order
Open any order. The Progress card is in the right-hand column, under Current Status.
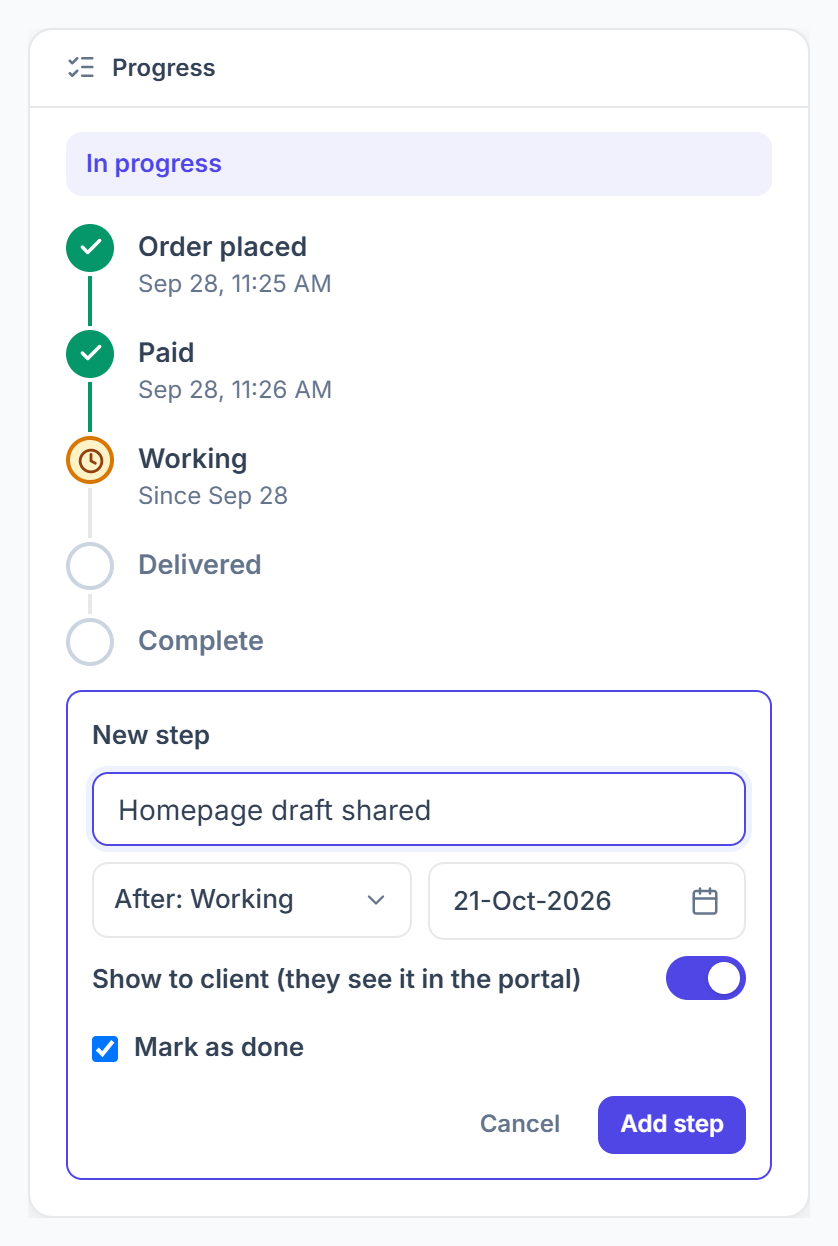
Fill out the new step
Click Add step. Write the step name (up to 120 characters), choose where it goes (At the start or after any step), and set the date. Show to client is on and Mark as done is checked unless you change them.
Save it
Click Add step. The step appears in its place with a Manual tag. The eye icon next to it means your client sees it in the portal.

How to Edit, Move or Hide a Progress Step
Use the ⋮ menu on a step you added. Steps that fill in automatically have no menu, because they follow the order.
- Move up and Move down change its place.
- Edit changes the name and date.
- Mark as done or Mark as not done sets its state.
- Hide from client keeps it for your team only; Show to client brings it back.
- Delete step removes it after you confirm.
Which Progress Steps Are Added Automatically?
Clientish builds these steps from the order itself, so you never add them manually.
What Does the Badge on the Progress Card Mean?
The badge sums up what the order needs next, in words for your team on the order page and in words for the client in the portal.