
Clientish Documents
Step-by-step guides for every module, from your first workspace to proposals, billing, support and automation.
How to Send Files to a Client for Approval in Clientish
Step by step: add Proofs to an order, attach files by link or from Google Drive, send them, reply to comments and send new versions.
When a design, PDF or draft is ready, you can send it for approval right from the order in Clientish. Your client reviews it in the portal, and every comment, decision and version stays in one table on the order.
Who can do it: the owner and admins, and team members with Edit Orders. Replying to comments needs Manage Order Messages.
Before You Begin
- Share each file so that anyone with the link can view it: in Google Drive, Share → General access → Anyone with the link → Viewer; in Figma, Anyone with the link can view; in Canva, the public view link.
- Or connect Google Drive in Integrations, with a Google Picker API key, to pick files you keep private.
How to Send Files to a Client for Approval
Add Proofs to the order
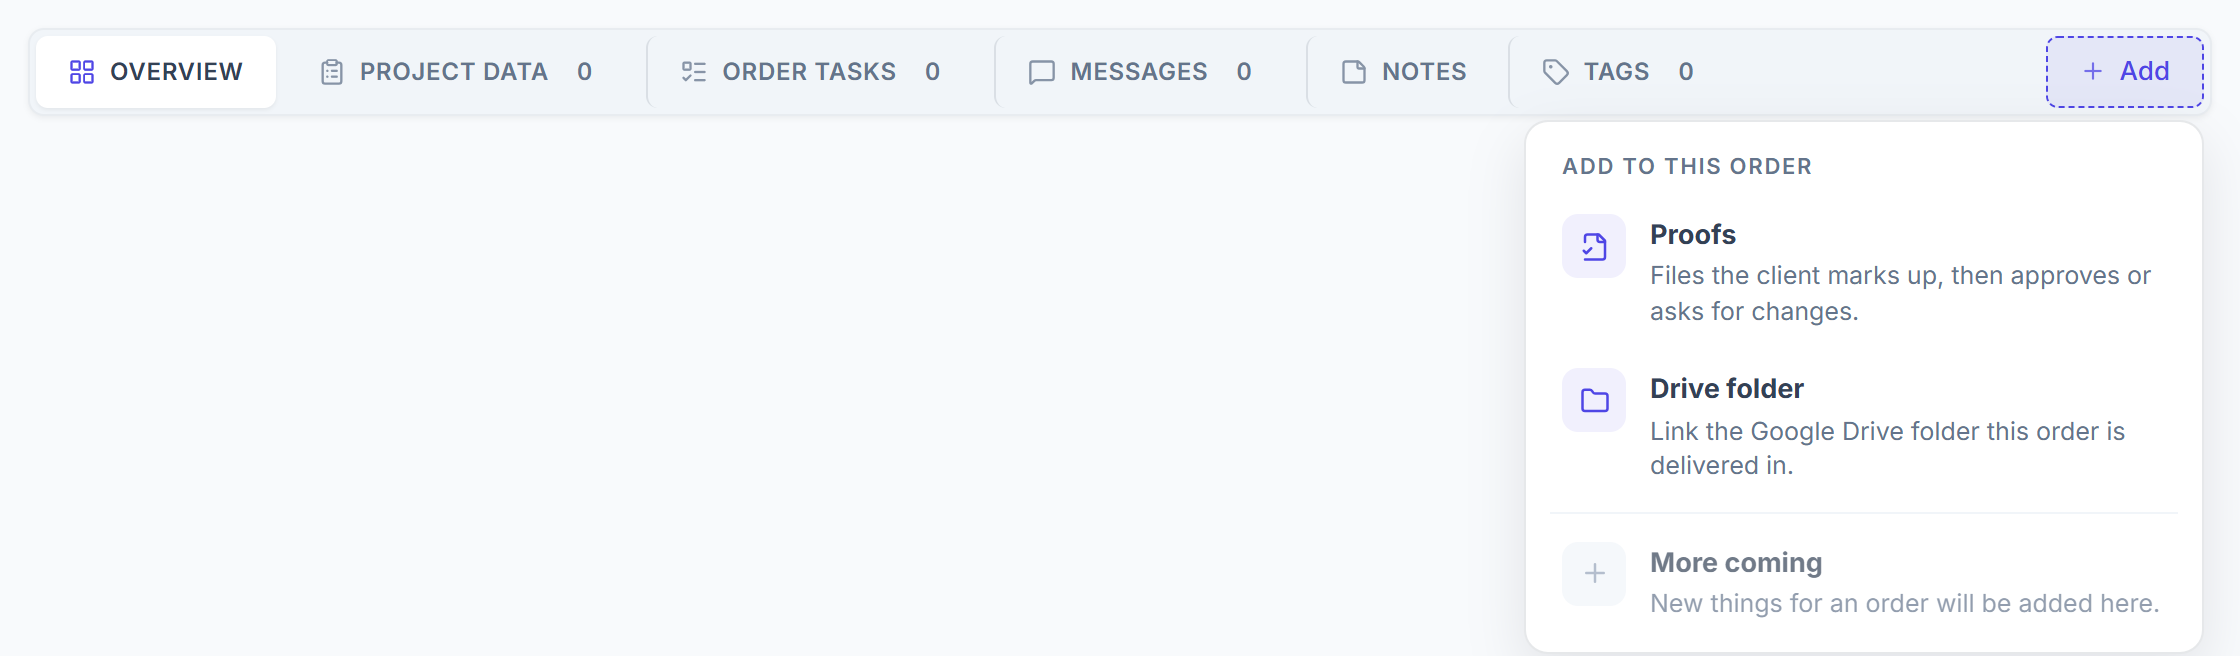
Open the order and click + Add at the end of the tab bar. Choose Proofs. A Proofs tab appears on the order.
Choose how to add a file
On the Proofs tab, click Add file. Pick Paste a link for Google Drive, Figma, Canva, Dropbox or any web page, or Pick from Google Drive to choose files in Google’s own window.
Paste the link and name the file
Paste the link. It’s checked right away: you see the file type, its size, whether anyone with the link can view it, and what your client will be able to do with it. Change Name the client sees if you want, then click Add file.
Send the files
New files wait as Draft, not sent until you send them. Click Send 1 file to client (the button counts your drafts), or Send on one row. The status changes to Waiting for client, and your client gets an email and a bell notification.


How to Answer Client Comments on a Proof
Open the file
Click Open on the file. The file is on the left with its numbered pins, and the comments are on the right.
Reply or leave a team note
Click Reply under a comment. Check Team only (client won’t see it) to write a note only your team can read.
Mark comments resolved
Use Mark resolved once a point is handled. Show resolved brings them back into view.
How to Send a New Version of a File
Start a new version
Open the file and click Add new version. A file you picked from Google Drive opens the Drive window again; any other file asks for a new link.
Describe the change and send it
Paste the new link and write a Note to the client. Tick Mark the 2 open comments as fixed in this version (it counts your open comments) and keep Send to the client now (email and bell) checked. Click Add and send.
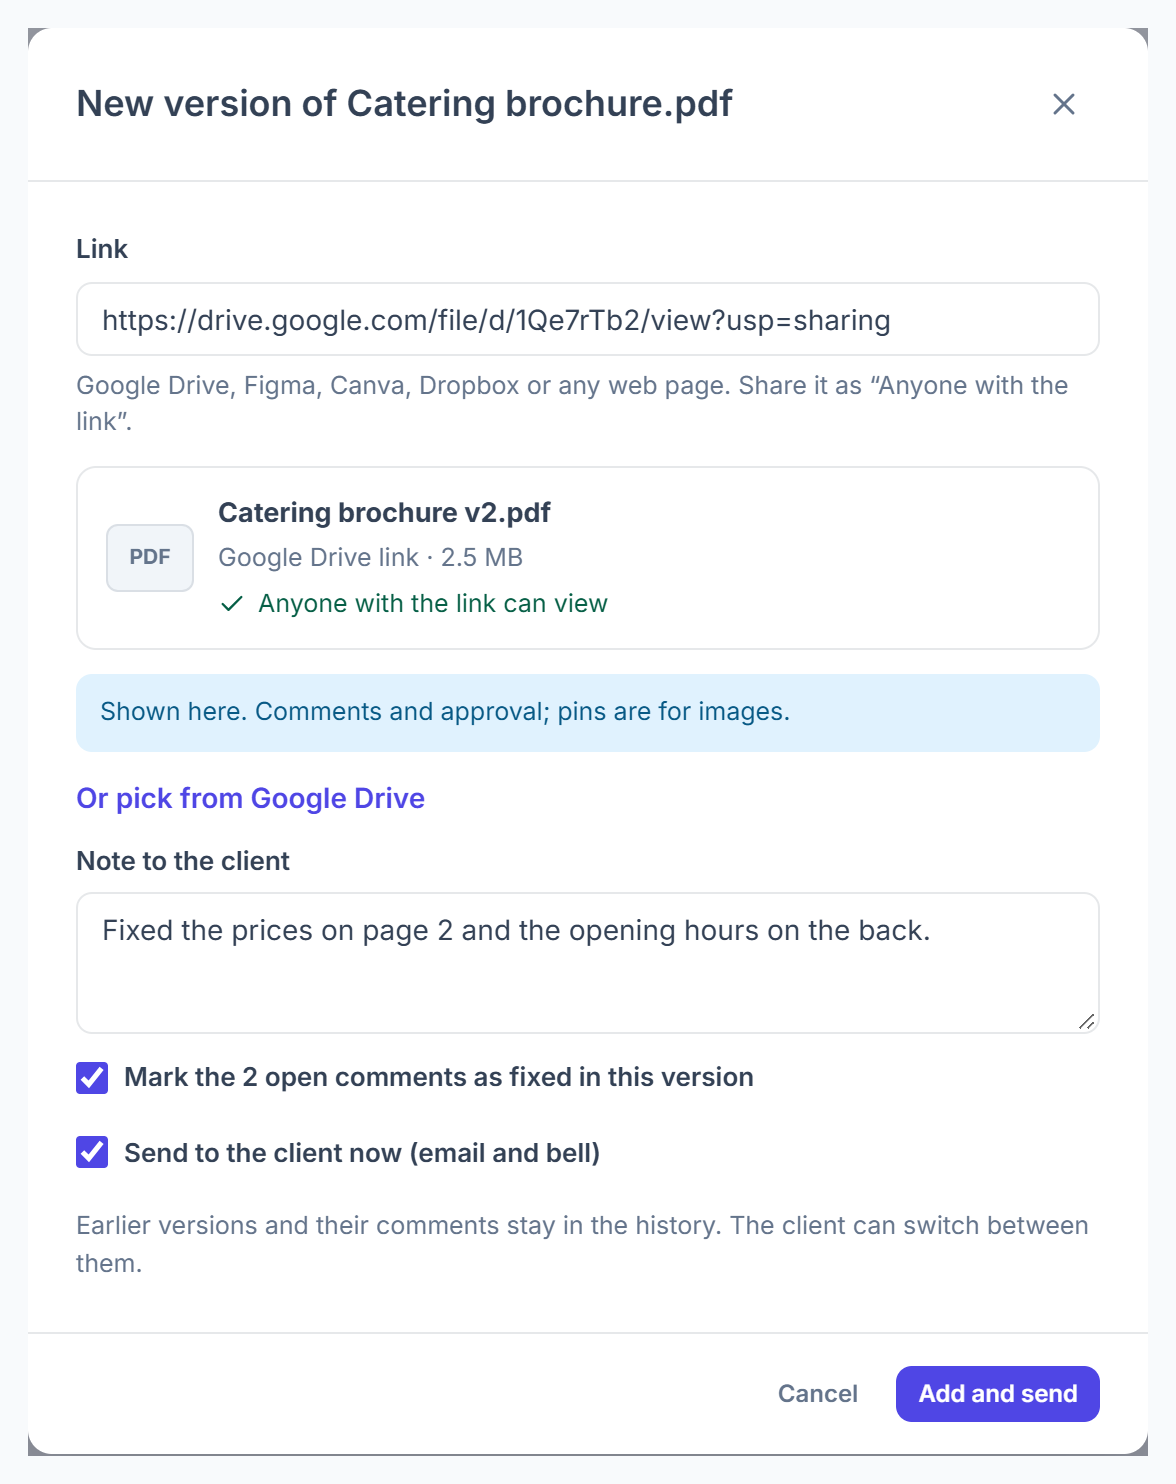
Earlier versions and their comments stay in the history, and your client switches between them in the version list. Comments you marked as fixed show “Fixed in v2”.
What Happens After the Client Approves or Asks for Changes?
Each decision updates the file’s status and sends a bell notification to the owner and the people assigned to the order.
- Approved: the file is finished. It takes no new pins and no new version.
- Changes asked: read the pinned comments, then send a new version.
- When every sent file is approved and the order is Delivered, the order completes automatically.
Problems When Sending Files for Approval
“Google Drive is not set up yet”⌄
“Reconnect Google Drive once to use Proofs”⌄
“That is a folder”⌄
“The file could not be opened from its link”⌄
To take a file back, use the ⋯ menu on its row and choose Remove. Your client no longer sees it, its comments go with it, and nothing is deleted where the file lives.
Related
- Clientish File Proofing: Pins, Approvals and Versions
- Clientish Delivery Approval and Order Progress
- Clientish Automations: act when a client asks for changes